Showing posts with label Colinette. Show all posts

Thursday, 5 April 2012

If at first you don't succeed

Surely you are wondering by now - what are you knitting?!

Well, after success with my previous reknit, i decided to take on another of the recycling projects in my stash (have a few- op).


I had this colinette jitterbug about 5 years ago. my mum has made a few of a feather and fan design cardigan which i think is just the best design for this blended yarn. After having a close up look at one of hers, i decided that i wanted to try one myself.

I remember i had knitted myself a jumper from a pattern before this, but this was definitely my first encounter with 4 ply, and so the first instruction in the pattern: 'cast on 148 stitches' - was quite overwhelming and instead i made the decision to only cast on 108. I was also quite hesitant to spend my money on wool then so really made quite a scrimped version of the cardigan, and although it did fit, it wasn't the same at all.

So although i did think it was pretty, i never really wore this one. And made the decision quite a long time ago that i would reknit it properly this time!

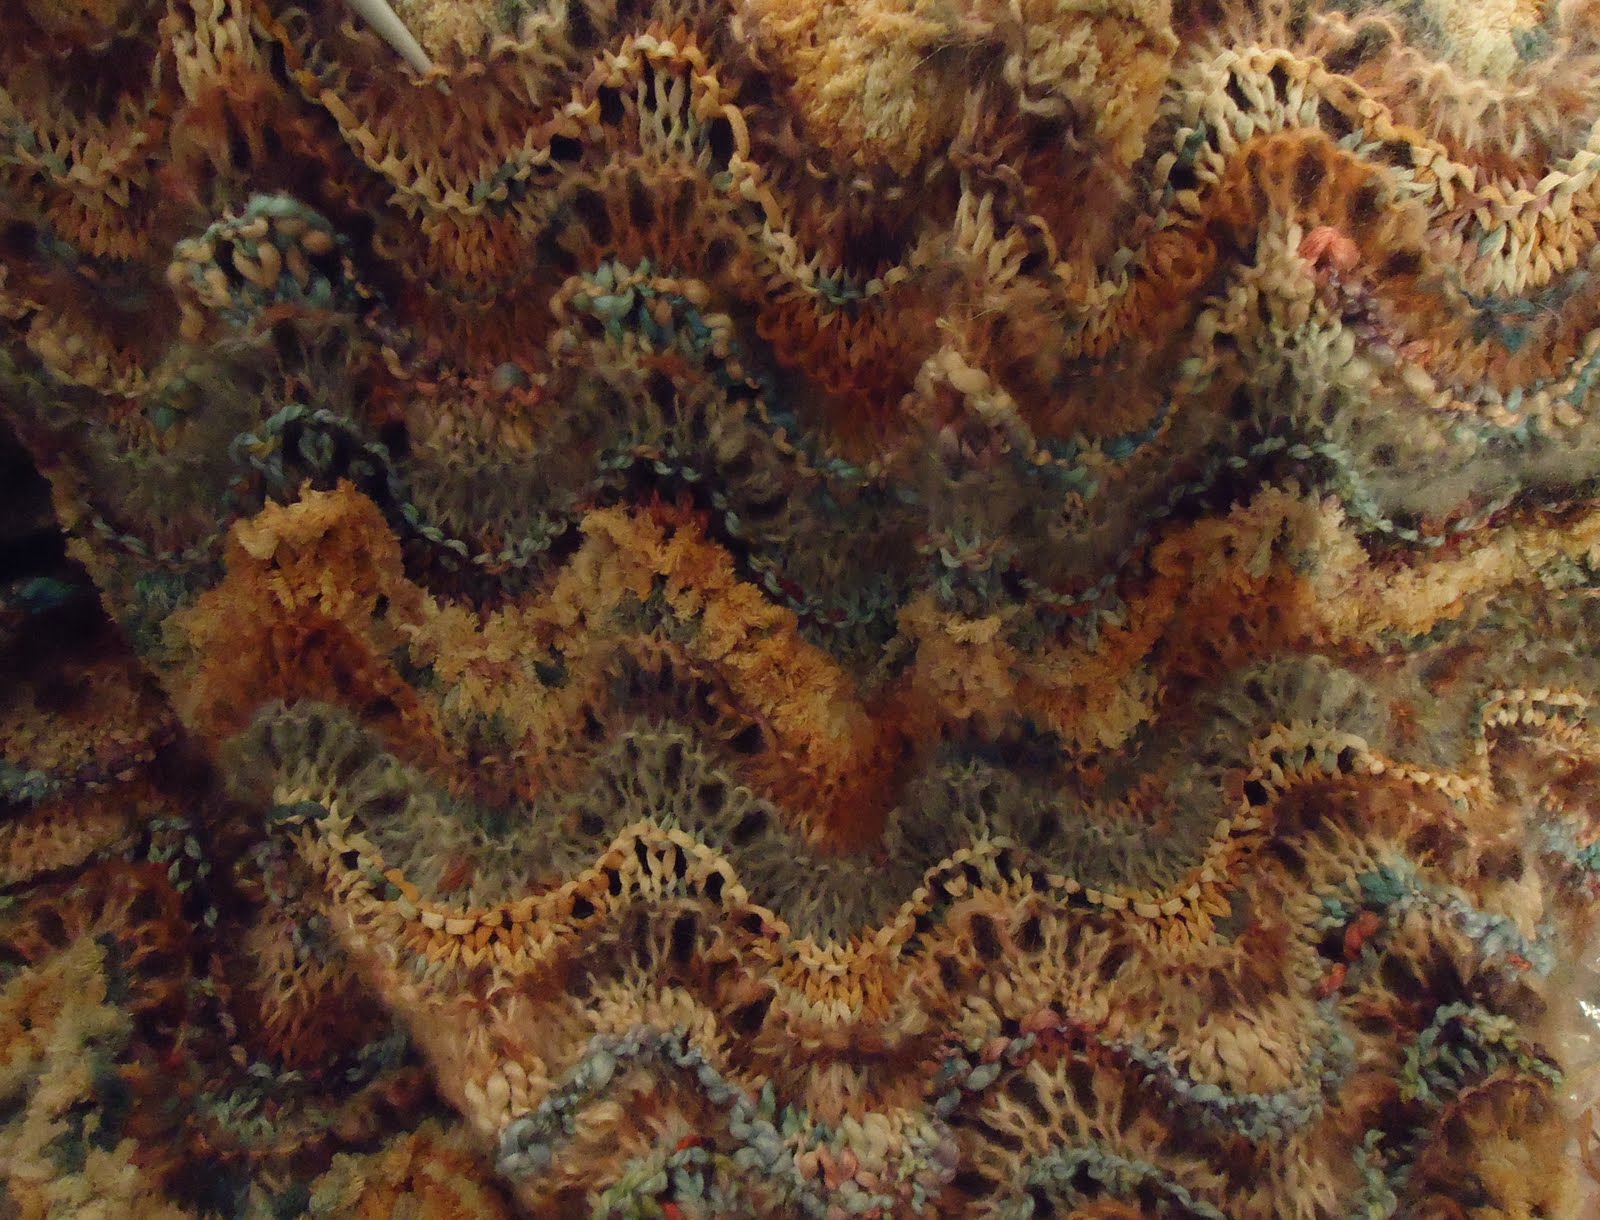
And so i have started. You can see it is a feather and fan lace pattern which means that although the rows are quite long, there's a bit of variation. And the colours make it quite exciting too.


i'm pleased i have made a start on some more reknitting. I loved the wool when i first bought it, and it is disheartening when projects don't work out first time, but this is lovely to see new things come of those old balls of wool.

Yours feathered and fanned,
Emilia. xx


Saturday, 31 March 2012

Mist Cardigan

I have been getting on quietly with my knitting, and really happy that my little recycling project is now complete!


The wool was quite distorted from having been knitted before, it had lost some of it's fluff and was more stretched and spindly than when it was new and so i had to treat it more like DK than Aran as it had originally been. This knitting is much tighter than before and so the wool didn't go quite as far (and also because i lost some in the unpicking process) but i think it means the colours are more blended and i had the perfect amount for this little short sleeved cardigan -a very economical pattern.


I love the collar! i think i will have to make more collared cardigans.

I have already started my next project which has a lot in common with this one! more soon!

Also i have joined in with pinterest. i am enjoying that a lot - what a good idea.

Yours another knit knitted,
Emilia. xxx

ps. i have also got three new friends - i will try to show them to you soon, but they are very small and quick.

Wednesday, 22 February 2012

my (nearly) new knit

One of my new year's resolutions was to do some wool recycling, and to reknit one of my old jumpers.

I wasn't really planning to do this so soon, but something about this grasped me and i started unpicking this cardigan you can see me wearing in this picture (and holding a baby - little lyra that is. she will be much more grown up now i expect)


It was originally knitted in pre blog days, and i really loved it for a while and wore it quite a lot. However, it was an early attempt at working out my own knitting pattern (and before i got this book) and more recently i have been not so keen on it's shape.

But i still love the wool (it's collinette art in colourway mist), and so what better action than to reknit to a better design.

However, due to the age of the original cardigan (i think perhaps three years) it was well set in it's ways and very crinkly when unravelled. The first attempt to knit with it produced some very lumpy bumpy results.

I wasn't really sure how to straighten it out, but wrapped it around the back of a chair and sat it near a radiator for about a week and although not completely flat, it is much much better now.

here you can see the wool - round the chair - near the radiator!

I went about choosing my pattern in a bit of a backwards way. I made a tension square and worked out that i needed about 80 stitches for the back. and then i found this pattern which uses 84... 

from woolworths!

The children's versions are knitted in DK, but as my wool is aran weight (or was when it was new - perhaps slightly finer for having been knitted already) so scales up to my size when knitted on the slightly bigger needles (at least i hope this is the plan) I am quite confident as remember my experience when scaling up the baby cardigan.

And i've made a good start i think. I will have to be careful as think i have lost some wool in the unpicking. Perhaps the short sleeve jumper version will be the best option, but i think that this is quite an economical pattern to knit - i hope there will be enough for the little collar though.


I am looking forward to wearing these colours again.

Yours thriftily,
Emily

xxx


Monday, 13 February 2012

Hat

Hello and here i am. nothing from me since january - but i have been busy, not just lazy. all will be revealed!

For now though, here is just a little peek of a small project.

It has been soooo cold recently that i was really spurred on to make myself a new hat. My old bobble hat was looking a little sorry for itself so I used some of the leftover mohair from my blanket (bit of a forehead itch, but it is worth it for the warmth!) and set about creating a warming headpiece.

I based the pattern on one i found in my vintage knitting book - so it is sort of a beret. but not quite. but i like it because it's like a nice fuzzy bowl.
Here i am - warm head.


It is a nice feeling to put some of my wool stash to good use. i used the last of this one on the bobble!

Lovely!

It seems today is a little more mild - perhaps it will be spring soon?

Yours insulated head,
Emilia. xxx

Sunday, 11 December 2011

Pig in blanket

Hello everyone - what a long time i was away for - but now i am back - and despite my silence, and much time christmas shopping, i have been productive with my time too and have a little bit of show and tell.

The main triumph of the past week has been finishing my blanket which i started earlier in the year and last shared progress of in May!

sorry about the shadows - today is a very bad lighting day!

I am really really really pleased with it. Because of all the lovely woollens it is SO warm. So very very warm. And also because of the loose knit and feather and fans, very stretchy so a little blanket goes a long way.


I still have a nice amount of wool left to make tassels for the ends, but i am thinking that they might get in my way a bit, and perhaps i will save those wools for some other little projects.

Another thing to tick off my list - and a real joy to behold!


And another joy is this pig in blanket i knitted in pre blog days. it was for rich because he had never heard of pigs in blankets. he is vegetarian though.

And now time for another hot strawberry ribena and a nap!

but back soon!

lots of love,
emilia. xxxx


Friday, 21 October 2011

Handy Mittens

Now the weather has turned to ice - but luckily for the last couple of weeks i have been working on these delights from my knitting book of olden days.


These are men's mittens - for a man who must use his fingers (so it says). But i used smaller needles and they have come out quite a good fit. Possibly a little bit long though.. but not to worry.

here you can see the fronts and backs! 

And i used some wool from my stash - some lovely vintage colinette (my mum gave me from a long long time ago!) and so it means these are lovely in blended inky colours. I am very pleased.

Yours warm of hand,
Emilia. x


Tuesday, 24 May 2011

blankety blank

Now i have been a little bit bad and have been keeping a rather big secret. despite already having a knitting project on the go. and as well with a quilt in progress and some embroidery. and some dressmaking. i still decided that i wanted to knit a blanket.

It all started just before i moved house and i wanted to make lots of things for the home. And this one was a little reward for the time i spent on costume making and a little moving present to myself.

I was inspired mainly by some  pictures of a colinette design which uses feather and fan pattern and really big needles (especially when I saw this one on kathyrnivy.com - there are a great deal of gems in her knitted collection - look at the pile up pups!)

There are so many colours from colinette and i did spend a lot of time mixing and matching. I know though that sometimes the colours on screen are not all that accurate and often vary from lot to lot. Also it was a bit overwhelming to try to match them not knowing how they would kint, so i decided to play it safe and use the colours that i had seen. That combination is called Sedona.

 i searched online for Sedona and found out it is a place in the arizona desert with brilliant blue skies and red rocks and golden sand.

The wool arrived in no time. It looked a bit different to the picture but this is often the way. I used my mum's swift and winder to make these balls which knit nicely from the centre!


Although i knew the lace pattern, there were other things i had to think hard about without the official pattern, such as how to order the colours, how many rows to do before changing, and weather to use garter rows and how often. I used the kathrynivy pictures and some other pictures i found online as a guide to begin with but soon decided that i was happy with a regular texture and it is nice to pick up a colour as i choose.

Although it is quite big, the needles are 8mm and so it is growing at a satisfactory rate. I don't think it looks quite the same as the original one I saw, but i really love the way it's turning out.


strange photos

Yours knowing she really needs to stop starting new things and finish something soon.

Emily


Wednesday, 24 November 2010

October Knitting Complete

This one has been a long term project due to all sorts of interruptions, however i am pleased to declare my October project complete!


lovely and warm on this very very cold day

a close up of my cable design

I am just in time as i have heard there is snow coming. this is exciting except that this weekend i am going to swindon and i know that trains and buses are not so good to rely on in adverse weather conditions.

Anyway. Would you like to know how i made this? I would like to make another for sure, although maybe not until next october, and maybe with some less fancy wool. And so, for the record, this was the procedure:

As this is a drop shoulder design, the shapes are very simple indeed. I used colinette skye for mine, but i am sure any aran weight yarn will be nice.

The Back:
Using number 9 needles (3.57mm), cast on 88 stitches and work 9 rows double rib (ie k2, p2, k2, p2 etc)
Row 10: continue rib but increase 9 stitches evenly across the row (on stitches number 9, 18, 27, 36, 45, 54, 63, 72 and 81) so you have now got 97 stitches.

Change to 4.5 mm needles.

Row 11: *p3, k1, p3, k8, repeat from * five times until last 7 stitches, p3, k1, p3
Row 12: *k3, yf sl1 yb, k3, p8, repeat from * five times until last 7 stitches, k3, yf sl1 yb, k3
Row 13: as 11
Row 14: as 12
Row 15: (this is a cable twist row) *p3, k1, p3, sl4 onto cable needle and hold in front, knit next 4 behind, knit 4 from cable needle, repeat from * until final 7 stitches, p3, k1, p3.
Row 16: as 12
Row 17: as 11
Row 18: as 12
Row 19: as 11
Row 20: as 12
Row 21: as 11
Row 22: as 12
Row 23: as 15

repeat these rows 16 - 23 until you have completed your 13th twist.

Shape for neck and shoulders:
Next row, keeping pattern correct work 45 stitches and turn. decrease by 5 (as you like, i used a variety of methods really - either k2tog or casting off. k2tog might be the better 1 as fewer loose ends to tie up!) and work to end of the row.
Turn and work this row, decreasing six at the end,
Turn and decrease 4, work to end
Turn and work row, decreasing 3 at end
Turn and decrease 2, work row and decrease 1 at other end too (to give a slight shoulder shape too)
Turn and decrease 2 at start and 2 at end of the row
Turn and decrease 1 at start and 3 at end of row
cast off.

with the stitches you have left on the other side, shape in the same (but opposite) way.

lovely!

Front pieces (work two - ensuring they mirror)
Worked identically to the back, however this time only cast on 44 stitches (on 3.75mm needles), work 9 rows in double rib and on the tenth row increase 4 across the row on the 8th, 18th, 28th, 38th stitches (48 stitches) 

This time work the pattern until you have completed 12 twists. continue for 3 more rows,
next  4 rows, decrease 3 from the inside (collar) edge (36 stitches) (rembmer: include the cable row when it comes)
next  4 rows, decrease 2 from the inside edge (28 rows)
next 2 rows, decrease 1 from inside edge,
next row decrease 1 from outside (shoulder) edge and 1 from inside (collar) edge
next row decrease 1 from inside edge and 2 from outside edge
next row, decrease 3 from outside edge and 2 form inside edge.
Cast off.


Sleeves (make 2)
I was not all so happy with my sleeves really, but will note what i did. I think if i were to do this again i would start with more stitches at the cuff and increase more gradually to make wider sleeves.
However, my sleeves were worked as follows:

Cast on 40 stitches and using 3.75mm needles work 9 rows double rib, and increase to 44 stitches on the 10th row. change to 4.5mm needles and work the cable pattern, increasing 1 stitch at each end of every 4th row until you have completed 119 rows (29 increases or 15 twists and 3 extra rows) cast off.


Construction
I used mattress stitch to sew my seams, and knitted double rib bands around the collar and then for the bands. I used this technique for button holes, and they have come out rather pleasingly! (i like this knitting help series on youtube!)


I fear my knitting patterns are not very user friendly. but hopefully they give a good sort of idea of what to do. I would like to do some more cable, but perhaps for panels and details, rather than all over. 

Now i have started a tension square for my next project. it is something much different and i am going to follow a pattern rather than making it up. i think this is something i should try more often. although there is a pleasant element of surprise when freestyling.

Keep warm,
yours snug,
Emilia.

ps. i am dedicating this piece of knitwear to my mouse Audrey who passed away at the weekend. I wrote a real dedication to her on my mouse blog, but feel this isn't so much the place. I miss her very much.

it was difficult to have my picture taken with mouse because she was so small and quick

Tuesday, 2 November 2010

How the knitting is coming along

i am in full swing with my October cardigan - which is just as well because it's november now. luckily we are going through a mild spell, but i think this chunky one will be of great use in the coming months. I have just realised i have not even mentioned this again since it was just in the idea stage - here are the updates:

My design has altered a bit from my first ideas as after speaking to my mum, who is the guru, i decided that I would be more adventurous with my cables than i first planned, and do an all over cable design. Here is a small sample:


This is the wool - Skye in dark jacob colourway. i am pleased with it i think - although am never sure until i'm finished. I did a few sample cables to begin with, as found any small twists were lost because of the patterns in the colours. This one is worked over 8 stitches every eight rows (i think that will only make sense if you have done some cable knitting - but i will give some better instructions when i come to write the pattern) Then either side of the cable is three stitches of reverse stocking stitch and a slip stitch line. I am pleased with this pattern. very simple, but quite nice.


My progress so far is that i have completed the back and one front panel, and almost a sleeve. i am not sure about the sleeve though, and might start it again. perhaps without cables, or with a different texture as i have seen that done before and it might be a good idea. i am not sure though, and seem to have knitted a lot of it, so perhaps i will persevere.

Also, before i get back to my knitting, and put  on the halloween special of psychoville, I would like to tell you about my cable needle - it is a hooked one. i hadn't seen one like this before (neither had the woman in the shop, or my mum) but i find it much easier to use than the straight or kinked types, as it holds the stitches safely but hangs out of the way very helpfully. i would recommend that type.


Yours knicker in a twist, let's twist again, marshmallow twist,
Emilia. xx

ps. i will leave you with some more Prada. it is good to be reminded of the inspiration.


Thursday, 14 October 2010

Last of my summer twine

I have finished! My epic knit of the summer is complete! My long and colourful cotton cardigan.
hip hip hooray, rejoice this day. (it is difficult to take photos these days because there's no more sunshine)

I closed my eyes (i closed my eyes) drew back the curtain (oohoohooh) to see for certian (oohooh) any dream will do.


Here is the pattern i wrote (i am not really sure that you would want to knit one of these, but just incase):

Long Cotton Cardigan
Materials:
Colinette Banwry (100% cotton) and 4mm needles (my tension which i have based this pattern on is = 20sts x 28 rows to 4”)


The Back
Cast on 110 sts and work in stocking stitch until work 110 rows ending on a P row.
Next row – for shaping to the back – k40, k2tog, k2, k2tog, k1, k2tog, k1, k2tog five times, k1, k2tog, k1, k2tog, k2, k2tog, k40 (to end of row) [99sts]
Continue to knit on these 99 sts for a further 90 rows (200 rows in total)


The Fronts
(Create 2 – work down)
Cast on 30 sts and working in stocking stitch, increase 1 stitch at the outer edge end of every fourth row (row 4, 8, 12, 16 etc) until you have worked 80 rows and have 50 sts.
Continue to work this way until you have 167 rows (or 32 rows from finished length)Then in the final 32 rows, decrease to form a curve, ending with 27 stitches to cast off. (this is optional, but a nice little touch)


The Sleeves
(create 2 – work down)
Cast on 65 sts and working in stocking stitch for 11 rows.
Next row k2tog to decrease one at each end of next and every twelfth row until you have worked 90 rows (51 sts) knit a further 10 rows, knit two rows, rib for 15 rows and cast off.


Sew the pieces together. I learnt a new sewing technique to sew my seams. It is a stitch called mattress stitch. It is so so simple to do and is really worth learning how because it is so neat.

seamless

Finally, finish with a border of your choice. This was the hardest part of the whole thing for me. First i crocheted - too baggy. then i knitted the border in rib stitch, but first time i cast off too tight, second attempt was a bit lop sided, third attempt... juuuuust right. The moral of this story is, if at first you don't succeed, try try again. I haven't put any buttons or fastenings on as think it will be my preference to wear it open. I am not sure on what occasion i will find to wear it. Maybe just on Sundays when we go to eat lavender cake at Treacle.

I finished just at the right time, as yesterday the wool i ordered for my October project arrived. Grand!

Yours moving on up now,


Emilia xx x x x x


Friday, 1 October 2010

A project for October

Today it is the start of October and my mind is thinking of the projects which will be lovely for the changing seasons. The last of my summer knitting is nearing completion now (it is in construction stage - so more on this soon) and my mind is wandering off to more woolly delights for the cold days ahead.

I really like all the cream aran cardigans i see around and think this is something i would really like to attempt. Yumi has been knitting a scarf as a present for her dad. it is called a toyboy scarf, and has some cable twists in it and it looks so lovely. i am very much inspired to make the leap and learn the techniques!


I have never done cabling before, so I am going to keep my first attempt nice and simple. I have drawn my preliminary design which is mostly stocking stitch, but has a bit of cabling at the front to get me started. Maybe twists or plaits would look nice there.

here is my vision. i enjoy the imagining stage.

 this will be similar to the effect i'd like to see - maybe less mauve lipstick
I have ordered the wool (it was payday and i couldn't hold back) - it is some aran and the colourway is called dark jacob. I hope it will be a good one for this project.

my picture has pixelated a little with enlargement, but you can see the colours

I was pleased to see some cable knits in Prada's A/W 2010 collection. And also some evidence of blended yarns. I like it when high fashion accommodates my hobbies.


i like this blue cardigan - far left

I think i could recreate the look with this wool from a new range by Colinette. Perhaps when i am more confident of cabling skills.

I wonder if Muiccia Prada likes Colinette too

yours autumnally,
Emilia. x

Monday, 30 August 2010

Work in Progress - a BIG bit of knitting

When i was in Topshop recently i tried on this cardigan:


I know that it doesn't really look much, but it is navy cotton and has drop sleeves and the way it hangs is just lovely. I was not so impressed by the pockets and the sleeves though so deciphered the pattern and decided i can make one like this, with all the elements i was inspired by but without the ugly parts.

The shapes are all just big oblongs, and i consulted my book - Design your own Knits by Debbie Abrahams and published by Hamlyn - and the guidelines for drop shoulders there told me that there was very minimal shaping, and oversized but not too bulky is best.

here is the cover of the book in case you like the sound of it and what to find it. it is useful i would say and has a nice lot of proportional graph paper - good for accurate shaping.

I couldn't find any cotton in a colour i really liked in the shops as a lot was for baby knitting so only in pastels, and some of the other blues were just too blue and not dark enough. Rowan had a good one though, but i was perhaps trying to convince myself that Colinette was the place to go (it is my fetish i fear)

So i indulged (again) in a large quantity of a yarn they sell called Banyan which i think is 100% cotton, although the website contradicts itself. Whatever it is, it is just what i was looking for. I went for the colour Bright Charcoal:

Colinette Banwry in Bright Charcoal

So far i have completed the back which is possibly the largest single piece of knitting i've ever seen! Knitting in stocking stitch is so fast and satisfying though - i am experiencing similar addiction symptoms as with the crochet.

I have had a couple of dilemmas along the way though - firstly about the width of it (knitting on circular needles allowed it to spread out and it just looked so enormous) and then about how plain and flat it looked without any lace or stitch detail. but i persevered on the back and persuaded myself that it will be better to be true to that one that inspired me and that sometimes less is more (especially when using quite a colourful yarn) and as it grew so did my belief in it. I did take one small action though and created a small ruche in the middle of the back. This has broken up the vastness with a little bit of shaping and also reduced the width so the measurement at the shoulders is closer to my original calculations, but it hasn't really interfered with the simplicity i was aiming for. All in all i am very happy with progress. The cotton has such a lovely weight to it. i just love to squeeze it.

It will be better to show what i mean with some pictures (the sun came out today so hopefully favourable conditions for photos soon)

Now i have started the front panel and it's growing fast! I am worried about how much knitting i am doing at the moment though, and might try to cut back this week and try to do a bit more reading. All this quick stocking stitch makes me realise that it would be quite easy to make a couple of basic cardigans for the winter, and much nicer and warmer ones than from the shops. But less about that for now - we still have 22 days of summer to go...

Yours ambitiously,
Emilia. xxxx

Thursday, 26 August 2010

Crochet V-Cluster Stitch Cardigan Jacket

At the weekend we went to the Brunswick Square Festival. That was lovely with loads of stalls. The crepes looked good. especially with cheese! And Lucianna bought Jemima along and i gave her the little cardigan i had made. And then Deb held her which had been one of her new year's resolutions. She is so lovely and laughs. And then we ate some amazing cakes.

Then it started to rain (which as been a bit of a theme of the week) and we went to the pub where i finished my cardigan! (well, i finished the crochet part there - tying loose ends and sewing on buttons meant last night was the final date of completion!)

My first big crochet project! Here we are then:

headless. you can sort of tell the colour - it is called Banwry.

I was waiting for some daylight to photograph it in, but all the days are dull so it looks like probably i'm on a mission in night vision. (ps. i cut my hair!)

Crochet is like a dream! It is so fast (partly because it is so addictive i think) and satisfying and easy to make grand effects. I saw a lovely book of crochet stitches which is very tempting - maybe for christmas. This stitch I have been calling butterflies in my head, but it is really called cluster v stitch. Here you can find some instructions for it. Very easy indeed. It reminds me of the knitted daisy stitch i used to knit a scarf for Robyn, but much much easier than that to achieve. I really love the weight and texture.

I made this pattern up as i went along, despite my initial reservations about making something in crochet without a pattern. I used the colinette art wool i had started to knit into a lacey cardigan, but decided to unravel. I really love this wool. it is something like a bamboo blend i think and is really soft and nice. And the colours have a sort of tweedish effect. I also used this one for this puff sleeve cardi you can see in this picture of me with the baby. The effect is very different when knitted, and also took a look less wool (the crochet is like a rug!)

Art wool when it is knitted. Baby Lyra thinks it is nice and soft to sit on.

Here i have written out the pattern for my crochet cardigan. It is not really perfect i don't think, but it might be good guidelines if you don't know where to start. One good thing about crochet is that if you have made the wrong shape, it is quite easy to add stitches in.


Crochet V-Cluster Stitch Cardigan Jacket Pattern 


I am a 32" bust, or size 8 and the finished garment measures 16.5" from side seam to side seam when laid flat. The stitch is called cluster v stitch. You can see how it is done here. I used these instructions but decided during my warm up phase that i would just chain one between each cluster rather than two which kept it a bit tighter. To increase the width you can add more stitches - each one measures about 3/4 of an inch, but it is worth doing a tension test.


For my Jacket I used 6 x 100g skeins of Colinette Art (aran wight yarn) and a 4.5mm crochet hook


Back
First make a chain of 97 (to increase add multiples of 4)


Working back into your chain, skip first 3 chains and crochet *1dc cl, 1ch, 1 dc cl* into the 4th loop. This *to* sequence is the cluster v stitch (you can see more instructions following the link above).


Skip the next three stitches in your chain and in the 4th work * to *


Repeat the stitch along the row. if you are following my pattern you should end up with 24. Finish the row with a dc and chain 2


Turn and on the next row work into the chain stitches you created in the middle of the cluster v. At the end of the row again chain 2 and turn. Work back and forth in this way until 16 rows have been completed (or to desired length)


Shape for arms:
On the next row skip the first 2 stitchs and work just 20 across, leaving the last two. Work a further 8 rows on these stitches.


Shape for the neck:
Work 8 stitches, chain 2, turn,
miss one and work seven (to keep the outer edge straight) chain 2
turn and work six, chain 2
turn and work six.


Work the opposite side identically.


FRONTS (make two)
Create a chain of 49, and from this work along to create 12 cluster v stitches. Work identically to the back for the length and arm shaping until 23 rows have been completed.

Shape for neck:
Work so the outer edge is straight, decreasing from the inner edge only:

Next row work 8 stitchs
Next row 8 stitches
Next row 7 stitches
Next row 6 stitches
Next row 6 stitches


SLEEVES (also make two)
Chain 77 and create a 19 cluster v chain
worked six rows
next row, decrease half a stitch at each end (just one cluster)
Work 3 rows.
Next row decrease another half a stitch at each end
Work three more rows
Continue to decrease on every fourth row like this until 13 stitches remain. Work 5 rows to finish (or more for longer sleeves)


FINISHING OFF
i sewed all the pieces together using slip stitch seams. then i crocheted around the edges to create front bands and a collar.


Charted Shapes
(click to enlarge)


I remember a while ago i was looking at some granny squares that Deb and Yumi were making into blankets and just couldn't understand crochet at all. But it's grand when you know how! i am converted.

By hook or by crook,
Emilia. xxx


Thursday, 12 August 2010

Yoke Cardigans - for baby, for me

I have finished the baby cardigan for little baby Jemima. I had to get a move on because she is growing fast. Here we are:


little sheep

My fairisle knitting leaves much to be desired - i should definitely have used circular needles for the yoke so that it could stretch out properly. Or i should investigate what it is stranding or instarsia. As it is, it's a little wrinkled, but a sweet one i think. i am pleased with it.

Here is the pattern for that if you want to make one yourself. She gives a version for a boy or a girl so you can decide which is most appropriate. When i started knitting this it was before Jemima was born and i was expecting her to be a boy. I liked the version with the flowers though as thought the extra colour was nice, but used some peach instead of pink to keep it a little neutral. that is a good tip if you knit it for a baby that is not yet born. I think this is a lovely pattern for a baby.

I had never knitted a cardigan top down or with a yoke before, so it was really fun and exciting to watch how it grows and see how it came together. It was so satisfying and i thought it would be the perfect design to use up my Colinette Prism Toscana yarn that i had bought at christmas but not found anything good to do with yet (it arrived a bit different than i was expecting - a bit eco-warrior)

I thought i would need to do some conversions of the pattern to get to my size, but after doing a tension square i found that the Prism knitted on 6mm needles scaled up the pattern to exactly my size! I was unsure of this for a long while, but couldn't work out any other way of doing it, so proceded in good faith. and rightly! The only alteration was because i knitted the yoke in garter stitch i had to add in a few rows to keep the length right, and with the arms i knitted them straight instead of decreasing as on the baby one. they had to be a lot longer to make adult proportions.

Here i am, happy with the finished result
This it the back. i like the effect with the garter stitch yoke
a close up. the wool is pretty colours in the end.

I have not really worn this since i finished - i think perhaps a change of buttons will help, and maybe a wash will help settle it down a little. A good one for the autumn, over my summer dress.

I am excited to see Jemima in hers too.

Yours sheepily,
Emilia. xxxx